Classification Web allows you to create your own personal notes at any location and save them so that they are available to you whenever you are logged on. Since the notes are associated with your log-on ID and are not stored on your local PC, they are displayed on any computer that is logged on to Classification Web using your log-on ID.
Here's an example of how to create a note. From the Classification Web Main Menu
screen,
click on Browse Classification Schedules. Type
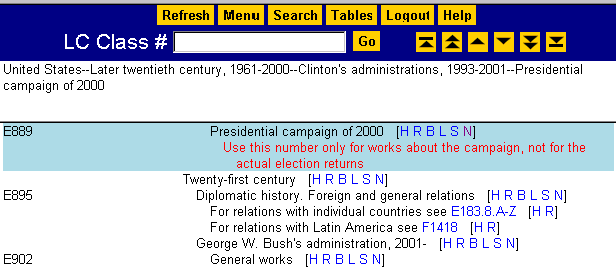
E889 in the Class # field and click Go. Click the letter N,
which appears in brackets to the right of the caption Presidential campaign of 2000. The
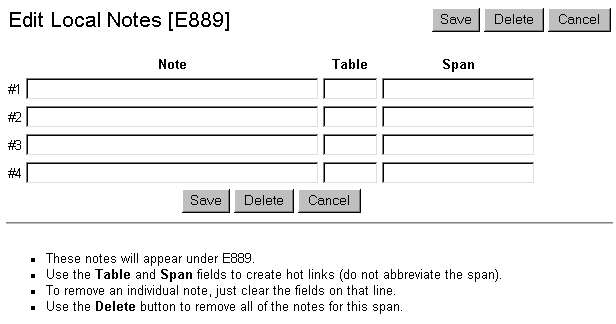
Edit Local Notes screen opens:

In field #1, under the heading Note, type Use this number only for works about the
campaign, not for the actual election returns. Then click Save. You are returned to
the browse screen. The text of your note appears in red under the caption for E889:

You can create as many as four different notes under any caption in the schedule, using fields #1-4 on the Edit Local Notes screen.
You can also make your own hot links from any classification number to any other classification
number. Click again on N to the right of the caption for E889. The Edit Local
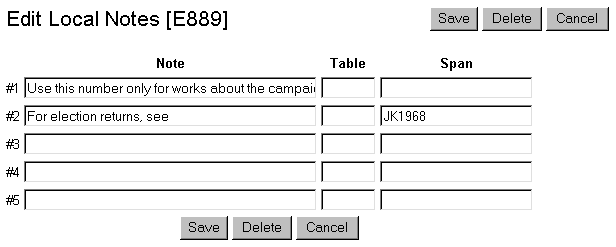
Notes screen opens. In field #2, under the heading Notes, type For election
returns see, and under the heading Span, type JK1968. (If you wanted to
make a hot link to a table number rather than a schedule number, you would type the table ID
number under the heading Table and the number within the table under the heading
Span. If you wanted to make a hot link to a span of numbers rather than to a single
number, you would type the full span, e.g. JK2311-JK2319 under the heading Span.):

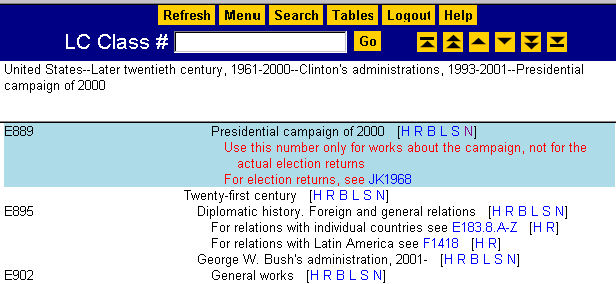
Then click Save. You are returned to the browse screen. The hot link you created
appears under the caption for E889:

If you wish to edit a note or hot link that you had previously created, click N to take you to the Edit Local Notes screen, where you can make any changes to the text that you wish. If you wish to delete a note that you had previously created, follow the instructions at the bottom of the Edit Local Notes screen.
Maintained by the Cataloging Policy and Support
Office